Quick tutorial on creating Prompts for OpenAI
Service Overview
Prompt Creation Assistance for OpenAI – A-I-DESIGN
Qu'est-ce qu'un Prompt ?
Un Prompt est une instruction ou une description donnée à une intelligence artificielle (comme OpenAI) afin d'obtenir une réponse précise, pertinente et adaptée à un objectif donné.
La qualité de la consigne détermine directement la qualité du résultat.
What is a prompt?
A prompt is an instruction or description given to an artificial intelligence (like OpenAI) to obtain a precise, relevant, and appropriate response for a given purpose.
The quality of the prompt directly determines the quality of the result.
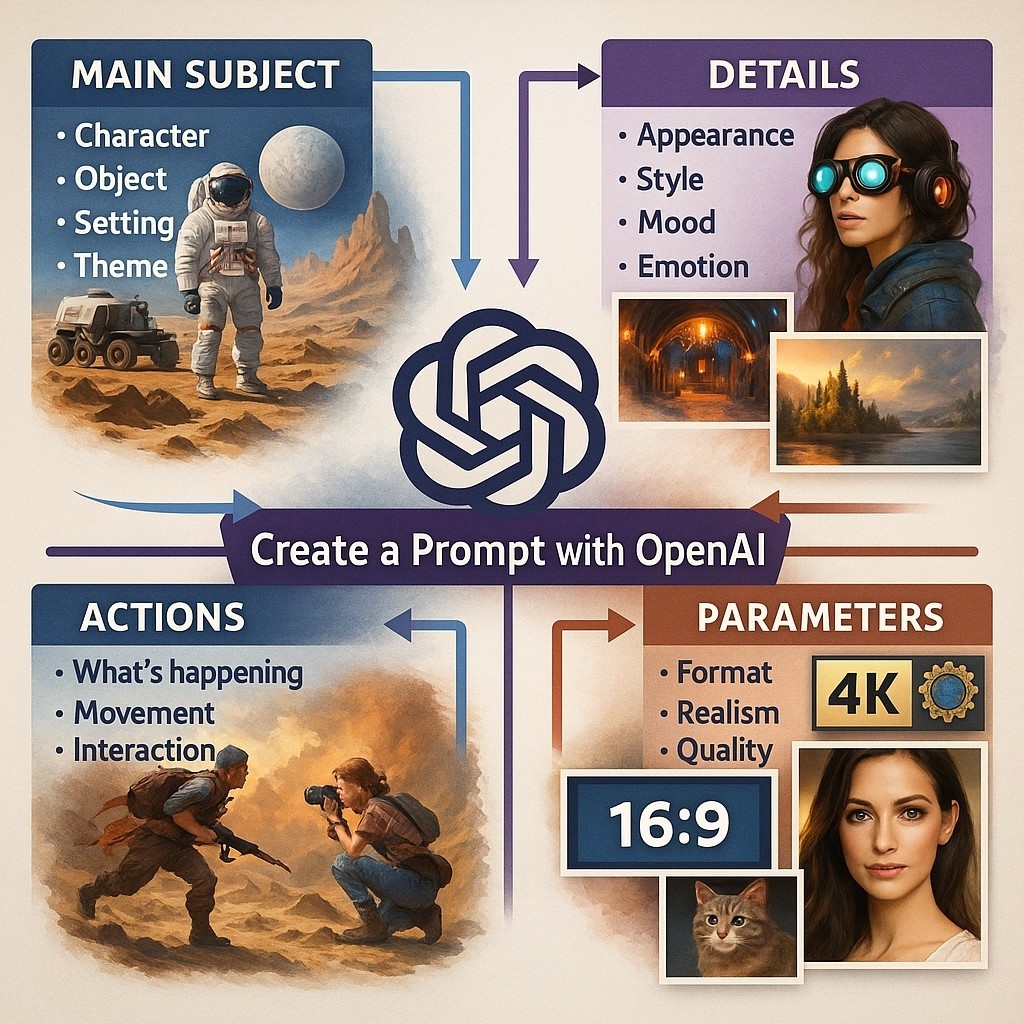
Bases d’un bon prompt pour Image 1.5 (OpenAI)
Un bon prompt contient généralement 4 composants clés :
1. 🎯 Sujet précis
Ce que tu veux représenter (ex. : un renard, un château, une fille dans un jardin…)
2. 🖌️ Style artistique
Dessin au crayon, aquarelle, bande dessinée, style manga, peinture à l’huile, style Pixar, esquisse, etc.
3. 💡 Ambiance / lumière / émotion
Ambiance sombre, lumineuse, rêveuse, nostalgique, dramatique…
4. 🔍 Détails visuels ou composition
Arrière-plan, vêtements, position, couleurs dominantes, cadrage (gros plan, plan large, vue du dessus…)
🧠 Structure de prompt recommandée
[Sujet], dans un style [artistique], avec une ambiance [émotion / lumière], composé de [détails ou éléments visuels]
Basics of a Good Prompt for Image 1.5 (OpenAI)
A good prompt generally contains four key components:
1. 🎯 Specific Subject
What you want to represent (e.g., a fox, a castle, a girl in a garden…)
2. 🖌️ Artistic Style
Pencil drawing, watercolor, comic book, manga style, oil painting, Pixar style, sketch, etc.
3. 💡 Atmosphere / Light / Emotion
Dark, bright, dreamy, nostalgic, dramatic atmosphere…
4. 🔍 Visual Details or Composition
Background, clothing, pose, dominant colors, framing (close-up, wide shot, top view…)
🧠 Recommended Prompt Structure
[Subject], in an [artistic] style, with an [emotional/lighting] atmosphere, composed of [details or visual elements]
Exemple de Prompt (Fr)
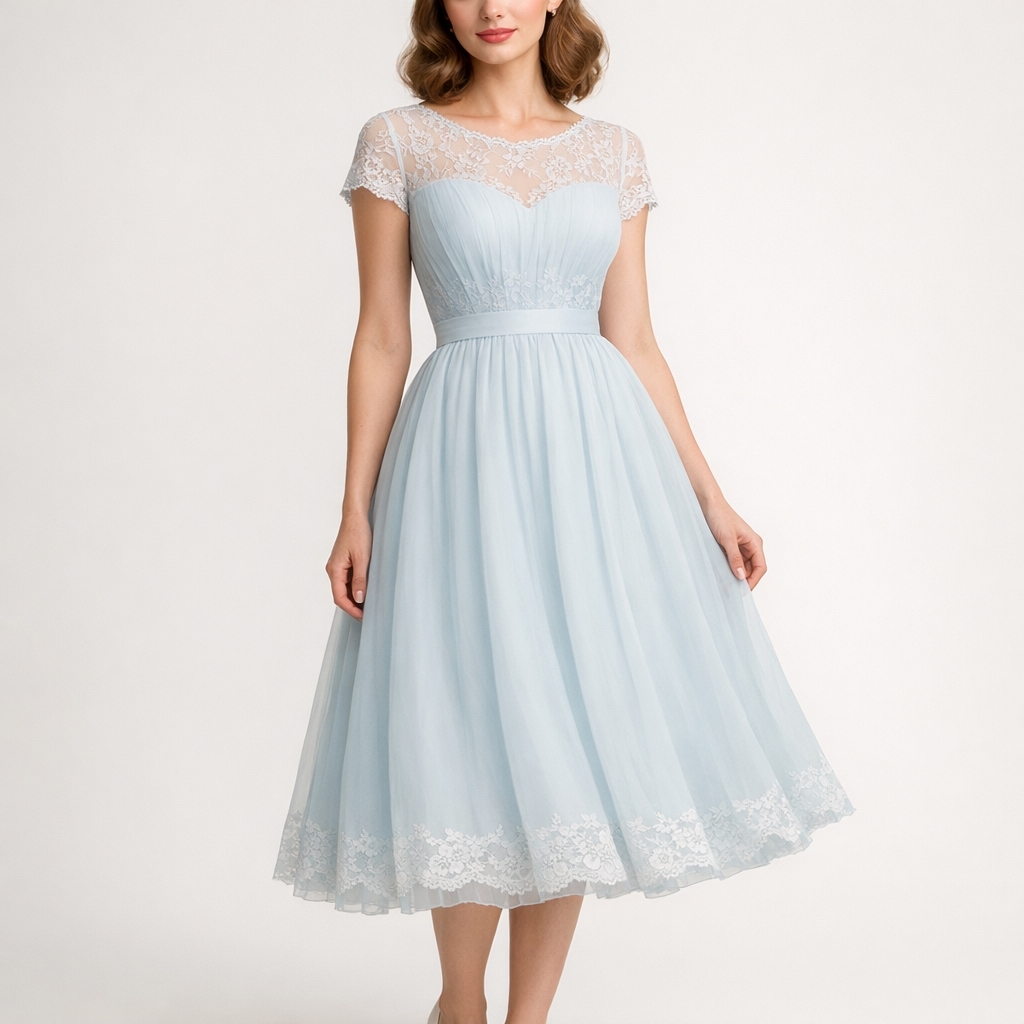
Robe classique pour femme présentée sur un mannequin : design élégant et intemporel, tissu long et fluide, taille cintrée, détails en dentelle subtils, douces teintes pastel comme l’ivoire ou le bleu pâle, style vintage années 1950, éclairage tamisé, fond blanc studio, grande précision des détails, sans texte, texture textile réaliste
Explication rapide :
- Sujet : robe de femme classique sur mannequin
- Style : vintage, années 1950
- Détails : taille marquée, dentelle, tissu fluide
- Couleurs : douces, pastels
- Arrière-plan : neutre pour bien mettre la robe en valeur
- Techniques : realistic, high detail, no text
Example of Prompt (En)
A classic women’s dress displayed on a mannequin, elegant and timeless design, long flowing fabric, fitted waist, subtle lace details, soft pastel colors like ivory or pale blue, vintage 1950s style, gentle lighting, white studio background, high detail, no text, realistic textile texture
Quick explanation:
- Subject: Classic women's dress on a mannequin
- Style: Vintage, 1950s
- Details: Defined waist, lace, flowing fabric
- Colors: Soft, pastel
- Background: Neutral to highlight the dress
- Techniques: Realistic, high detail, no text
Result obtained
STUDIO MODE — Complete Workflow
STUDIO MODE
│
├── 1. SELECT THE MODEL
│ │
│ ├── Choose a personal model
│ │ or
│ └── Select an AI-generated model
│
│ The selected model becomes the main base of the project.
│
├── 2. ADD THE ELEMENTS
│ │
│ ├── Main garment
│ ├── Secondary garment (optional)
│ ├── Scrapbooking (optional)
│ ├── Fabric / canvas / texture
│ ├── Accessories
│ │ ├── Bag
│ │ ├── Shoes
│ │ ├── Jewelry
│ │ ├── Glasses
│ │ ├── Hat
│ │ └── Other accessories
│ │
│ └── Background / setting
│
│ The project can contain from 3 to 8 images.
│
├── 3. CHOOSE THE DRESSING METHOD
│ │
│ ├── METHOD 1 — ELEMENT-BY-ELEMENT (1 or 2 garments)
│ │ │
│ │ ├── Select the model
│ │ ├── Add the main garment
│ │ ├── Add a secondary garment if required
│ │ ├── Add accessories
│ │ ├── Add fabric or visual elements
│ │ └── Add the background
│ │
│ └── METHOD 2 — SCRAPBOOKING (1 garment)
│ │
│ ├── Select the model
│ ├── Add one scrapbooking image
│ │ containing the outfit and accessories
│ └── Add other individual elements if necessary
│
├── 4. ASSIGN A ROLE TO EACH IMAGE
│ │
│ ├── Main model
│ ├── Main garment
│ ├── Secondary garment
│ ├── Scrapbooking / outfit reference
│ ├── Fabric / texture
│ ├── Accessory
│ ├── Background
│ ├── Visual detail
│ └── Free element
│
├── 5. DEFINE THE APPLICATION AREA
│ │
│ ├── Global
│ ├── Upper body
│ ├── Lower body
│ ├── Sleeves
│ ├── Collar
│ ├── Selected garment area
│ ├── Background
│ └── Other specific area
│
│ This step is only required when the element
│ must be applied to a specific part of the image.
│
├── 6. ADD SPECIFIC INSTRUCTIONS TO EACH ELEMENT
│ │
│ ├── Select an image
│ │
│ └── Add an optional prompt complement
│ describing exactly how the element must be used
│
│ Examples:
│
│ Model:
│ "Keep the original pose, silhouette and orientation."
│
│ Main garment:
│ "Dress the model with this garment while preserving
│ its original cut, proportions and design."
│
│ Secondary garment:
│ "Place this garment over the main garment
│ without hiding its main details."
│
│ Scrapbooking:
│ "Use the clothing and accessories shown in this
│ scrapbooking to create the complete outfit."
│
│ Fabric:
│ "Apply this fabric only to the sleeves and collar."
│
│ Accessory:
│ "Add this bag to the model's right hand."
│
│ Background:
│ "Integrate the model into this setting while
│ preserving realistic scale and perspective."
│
├── 7. ANALYZE THE PROJECT
│ │
│ ├── Check all selected images
│ ├── Check their roles
│ ├── Check application areas
│ ├── Check prompt complements
│ ├── Check consistency between elements
│ └── Check that the project is complete
│
├── 8. GENERATE THE FINAL PROMPT
│ │
│ ├── Combine the main request
│ ├── Include the selected model
│ ├── Include all garments
│ ├── Include accessories
│ ├── Include the scrapbooking if used
│ ├── Include application areas
│ ├── Include each image's specific instructions
│ └── Generate one complete AI instruction
│
├── 9. SEND TO AI
│ │
│ ├── Click "New Request"
│ └── Send:
│ ├── The images
│ ├── Their roles
│ ├── Their application areas
│ └── The final prompt
│
├── 10. AI PROCESSING
│ │
│ ├── Identify the model
│ ├── Identify garments and accessories
│ ├── Interpret the scrapbooking if used
│ ├── Adapt the elements to the model
│ ├── Resize them automatically
│ ├── Position them correctly
│ ├── Respect body proportions
│ ├── Respect the requested areas
│ └── Generate the final composition
│
├── 11. RECEIVE THE FINAL IMAGE
│ │
│ └── Display the AI-generated result
│
├── 12. REVIEW THE RESULT
│ │
│ ├── Check the model
│ ├── Check garment placement
│ ├── Check the main and secondary garments
│ ├── Check accessories
│ ├── Check the background
│ └── Check overall visual consistency
│
├── 13. SAVE THE RESULT
│ │
│ ├── Save the request
│ ├── Save the generated image
│ └── Associate the result with the current project
│
└── 14. CREATE A VARIANT IF REQUIRED
│
├── Modify one or more specifications
├── Change an element
├── Replace a garment or accessory
├── Modify the prompt complement
├── Generate a new image
└── Save it as a new variant